What’s the worst thing that could happen to your blog?
For many bloggers, the answer is getting blacklisted by Google and seeing all their organic traffic vanish overnight.
And a common way this happens is when Google realizes your blog is infected before you do and simply blacklists you.
This almost happened to my friend Anna from Garlic Delight a few days ago.
Luckily a few simple SEO checks allowed her to notice the malware and get rid of it before being blacklisted.
This article will show you how to perform these SEO checks and make sure there is no major issue with your on-page SEO.
#1 Make sure you are using HTTPS

The “not secure” warning visitors will see if you don’t use HTTPS.
Have you ever visited a website and seen a “not secure” warning in your browser?
That’s most likely because the page you visited didn’t have a SSL certificate.
This is a problem because Google considers the lack of SSL certificate a negative ranking factor but also because many web browsers display scary “not secure” warnings when visitors visit websites that don’t have a SSL certificate.
Which is why the first step in this on-page SEO checklist is simply to go to Google and search:
site:yoursite.com -inurl:https
This will show you all your blog URLs that are indexed and don’t use HTTPS.
If nothing appears, congrats! Your blog uses a SSL certificate and you can move to the next item of the checklist.
If you see some pages appear, you may need to:
- Install a SSL certificate and configure it.
- Redirect all your HTTP traffic to HTTPS
- Update your internal links and make sure they all start with HTTPS (if you already have a working SSL certificate).
A quick way to replace all your internal links with the https version is to use the Better Search Replace plugin.
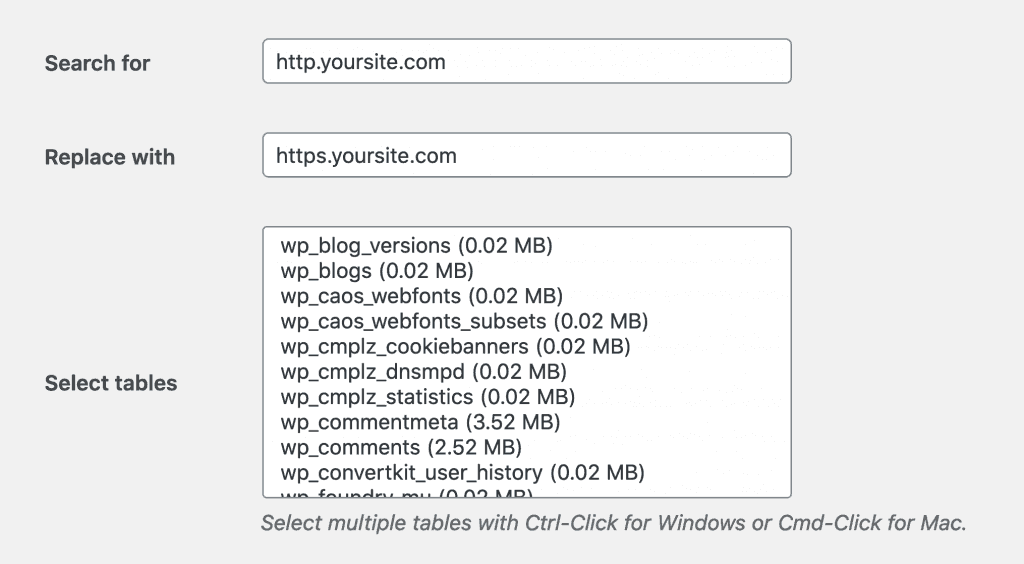
Warning: Make sure you backup your blog before using Better Search Replace because this kind of change can easily cause unexpected issues.
Not sure how to install a SSL certificate and redirect all traffic to HTTPS? The exact steps depend on the website and hosting configuration so I recommend contacting your hosting provider and asking them.
#2 Choose between www and non www
Using www before your website’s address used to be the norm but more and more website decided to drop the (mostly) useless www.
This resulted in lots of websites having a mix of www and non www pages indexed in Google. That’s rather problematic because Google considers the www version and non www version of a website to be different websites and ranks them differently.
In other words, the backlinks that help the www version of your blog rank won’t help the non www version. And vice versa. From Google’s point of growwithless.com and www.growwithless.com are different websites.
That’s why the second step of this on-page SEO checklist is to make sure that your blog URLs are consistent in their use of www.
Whether you use www or non www as your main address doesn’t matter but make sure you pick one and use it consistently.
If your blog uses www and you would like to find potential non www URLs that shouldn’t exist, simply Google:
site:example.com -inurl:www
You will then see all the indexed urls that don’t contain www.
And if your blog doesn’t use www and you would like to find www URLls that shouldn’t exist, simply search:
site:example.com inurl:www
You will then see if Google has indexed any www page.
The next step depends on the cause of the problem but I recommend starting by:
- Asking your hosting provider how to redirect all traffic to the url version you use (ie example.com to www.example.com if you use www)
- Making sure your internal links use the correct version.
- Making sure the canonical URL uses the correct structure (www or non www).
For example, searching “site:garlicdelight.com inurl:www” shows one URL indexed with www even though garlicdelight.com doesn’t use www.
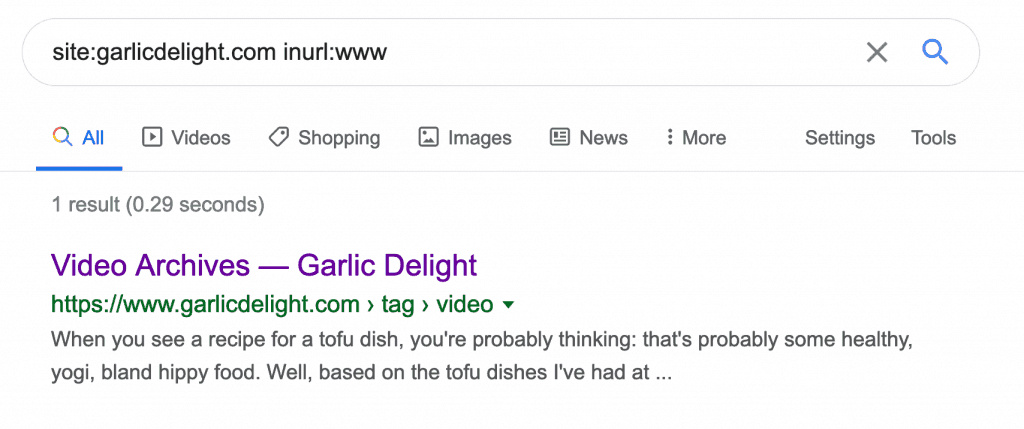
Clicking on this search result brings me to https://garlicdelight.com/tag/video/. This means a redirect is already in place.
Looking at the source code of the page also shows that the canonical URL is https://garlicdelight.com/tag/video/ and not the WWW version.
This means that Google is most likely showing the www version because there are internal links pointing to it.
In this situation, the best course of action is to use Better Search Replace to find all mentions of the WWW address and replace them with the non WWW version.
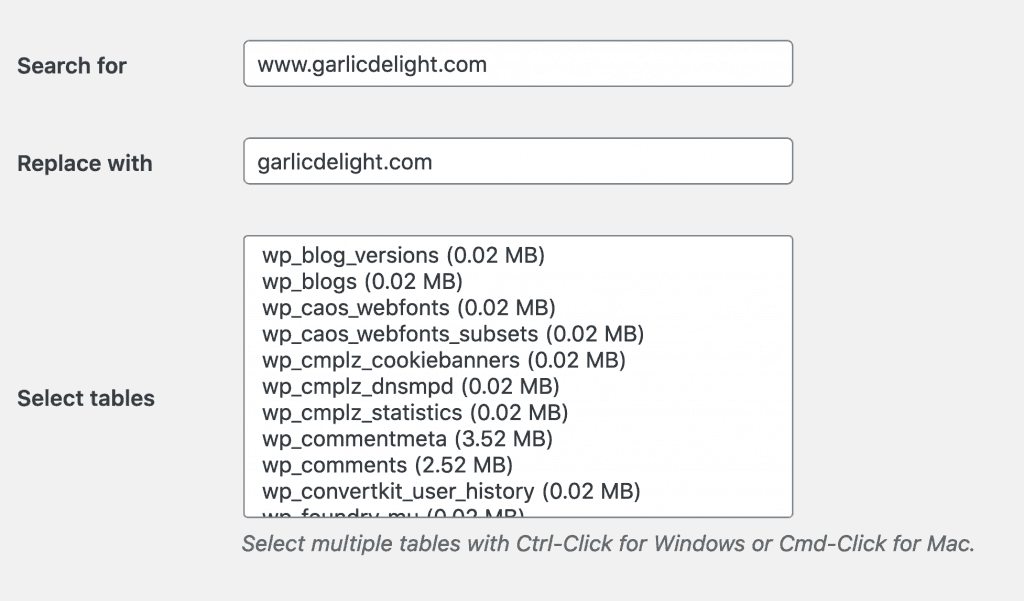
If you do that, make sure to backup your site beforehand. You may also want to check “Run as dry run” to see how many URLs would be affected.
#3 Look for missing meta descriptions and title tags
Meta tags are lines of HTML code that provide information about a page. The two most common ones are the meta description and meta title tag.
The title tag is what Google usually uses as the title of your page in search results while the meta description is what Google usually uses as the description of your page in search results.
I say usually because search engines sometimes choose to make up a title and description if they think yours is not suitable.
That’s why it’s important to include a title tag and meta description on all your pages. If you don’t, search engines will simply create one automatically.
If you have Yoast SEO or The SEO Framework installed, you will find the option to add a meta descriptioon and title tag under your article in the WordPress editor.
If you don’t, I highly recommend installing one of these two SEO plugins.
#4 Look for missing alt tags
Alt tags are snippets of HTML code that give information about images.
They help Google and visually-impaired people understand what your image is about and are therefore essential.
Not sure whether an image is using an alt tag or not? Right-click on the image, select “inspect element” (or equivalent) and check whether you see alt=“the title tag content” in the code. If you do, the image has an alt tag, otherwise, you may want to add one in WordPress.
Don’t worry too much about the content of your alt tags, simply ask yourself: what’s the best way to describe what this picture/image shows to someone who can not see it?
If your image pictures a black cat drinking milk, simply write “black cat drinking milk.” If the picture shows sliced carrots on a beautiful marble countertop, write “sliced carrots on a beautiful marble countertop.”
#5 Look for broken links
In addition to being annoying for visitors, broken links can potentially hurt your blog because Google penalizes websites with too many broken links.
That’s why the fifth step of this on-site SEO checklist is simply to use a broken link checker like Dead Link Checker and fix your broken links.
https://www.deadlinkchecker.com/
Once you find broken links, you can use a plugin like Safe Redirect Manager to:
- Redirect them to the correct page if it exists.
- Redirect to a similar page.
- Redirect to the front page if no other suitable page exists.
#6 Make sure your blog is fast enough
Having a fast blog is essential if you want to rank well in Google and offer a pleasant browsing experience.
That’s why the final step of this SEO checklist is simply to make sure that your blog is fast enough.
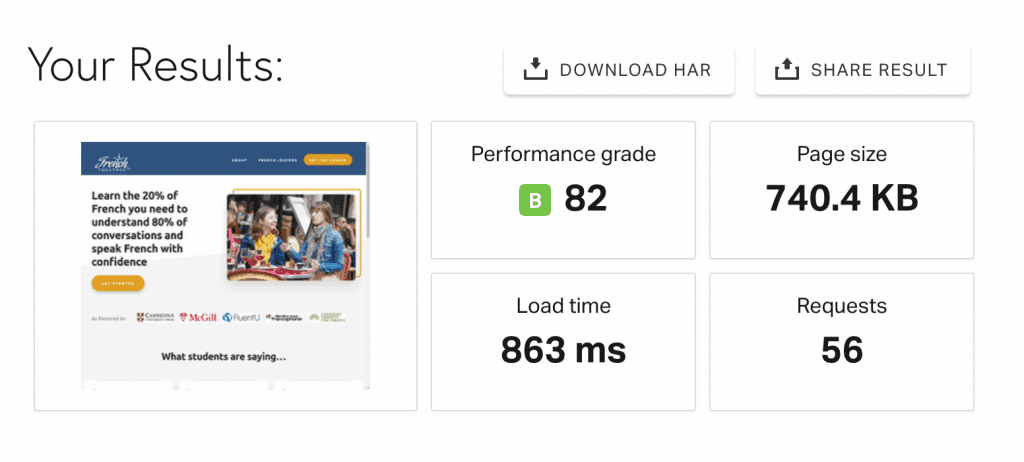
To do that, simply enter your blog URL in Pingdom Tools and see how fast it loads.
Under 1 second? You are doing great!
Under 2 seconds? Not bad.
Under 3 seconds? You may want to follow these tips and optimize its speed?
More than 3 seconds? You need to make changes.
How to spot other SEO mistakes
The on-site SEO mistakes mentioned in this article are some of the most common bloggers make but they are far from the only ones.
One of the best ways to spot SEO mistakes is simply to search for your site on Google by using:
site:example.com
and see if you notice anything strange.
This could be:
- Weird URLs that shouldn’t show up in Google (replytocom, urls in foreign languages…)
- No title
- No meta descriptions (although google sometimes doesn’t include them)
- Titles and descriptions written in foreign languages
For example. I decided to search for SEO mistakes on my friend Anna’s website Garlic Delight and quickly noticed a few weird URls when searching site:garlicdelight.com.
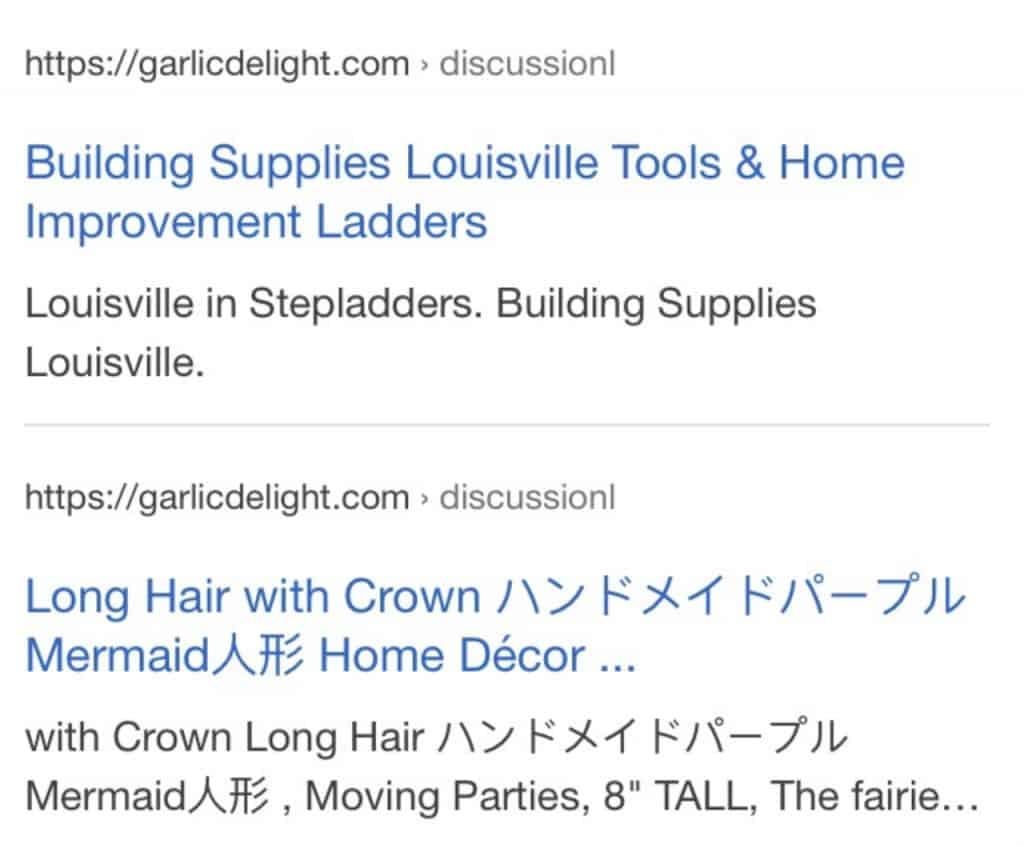
It turns out that her website had been hacked and some pages were redirecting to a shady online shop.
Without the steps described in this article, Anna may not have noticed the malware and her blog could have ended up being blacklisted by Google so make sure you go through this on-site SEO checklist regularly.
Did this on-page SEO checklist help you identify problems with your blog? Post a comment and let me know!
Featured image credit: Glenn Carstens-Peters - Unsplash